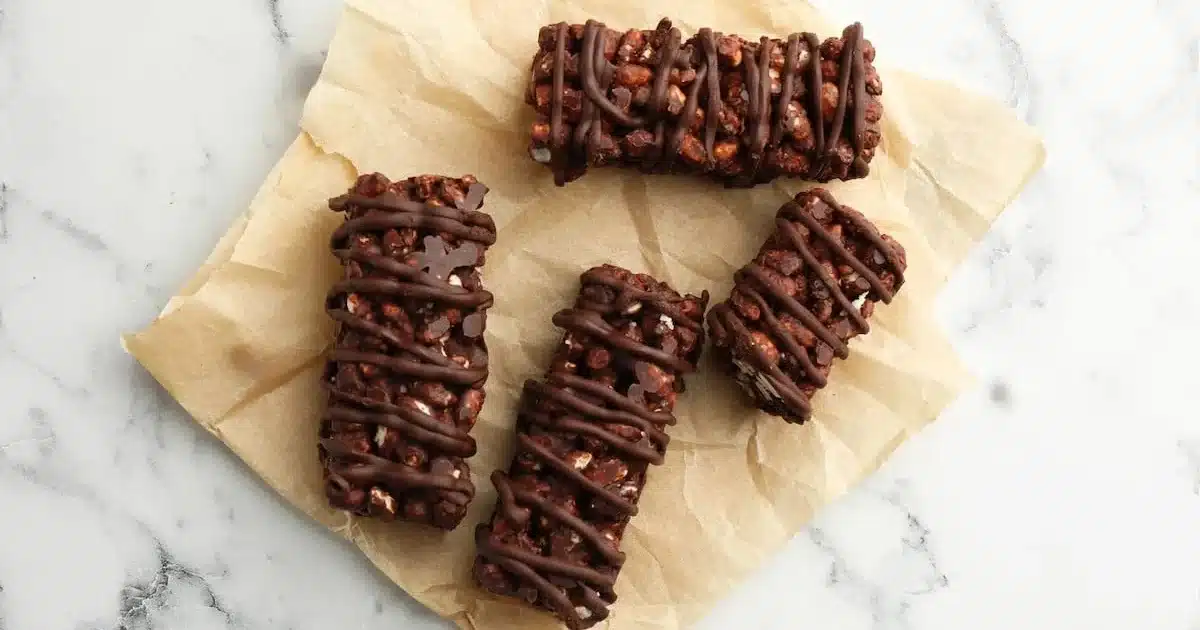
Homemade chocolate energy cereal bars made with just 4 ingredients are ready in under 20 minutes — baking included. They deliver real satiety, far less sugar than store-bought versions, and fit easily into a bag for school, the office, or post-workout recovery.
Store shelves are packed with cereal bars that promise energy and health but deliver mostly additives, palm oil, and a sugar spike that fades within the hour. Making your own changes the equation entirely. With 200 g of oats, 100 g of chocolate, 50 g of maple syrup, and 50 g of coconut oil, you get 8 solid bars that hold together, taste genuinely good, and cost a fraction of the packaged alternatives.
The process is straightforward enough for a Sunday afternoon or a busy weekday evening. And if you enjoy quick, satisfying recipes like these no-cook energy balls, this baked version offers the same spirit with a little more structure and crunch.
Only 4 ingredients, and each one pulls its weight
The simplicity of this recipe is not a compromise. Every ingredient serves a clear purpose, and none of them are filler.
Oats as the nutritional backbone
Rolled oats are the foundation of these bars, both structurally and nutritionally. 200 g of oats provides complex carbohydrates that digest slowly, which translates directly into sustained energy and a genuine feeling of fullness. That's what separates a homemade oat bar from a processed snack: the fiber content stays intact, the glycemic load stays reasonable, and your body actually has something to work with.
For a different texture, puffed rice works as a direct substitute. The result is lighter and crispier, closer to a rice crispy treat, but the binding logic stays the same.
Chocolate and coconut oil: the binding duo
100 g of dark or milk chocolate melted together with 50 g of coconut oil creates the glue that holds everything together. The coconut oil lowers the chocolate's viscosity while adding a subtle richness, making the mixture easy to coat every oat flake evenly. Dark chocolate adds a slight bitterness that balances the sweetness of the maple syrup; milk chocolate gives a more crowd-pleasing result, especially for kids.
Maple syrup (50 g) completes the binding trio. It's less refined than white sugar and contributes a light caramel note that pairs well with both chocolate varieties.
A pinch of fleur de sel sprinkled right out of the oven intensifies the chocolate flavor and adds a pleasant contrast to the sweetness. It takes two seconds and makes a noticeable difference.
The recipe step by step
The active preparation time is well under 20 minutes. Most of the work happens while the oven does its job.
- Preheat the oven to 180°C.
- Melt the chocolate with the coconut oil until the mixture is smooth and glossy — a double boiler or short microwave bursts both work.
- Combine the rolled oats, maple syrup, and melted chocolate mixture in a bowl. Stir until every flake is coated.
- Transfer to a square baking pan lined with parchment paper. Press the mixture down firmly and evenly.
- Bake for 15 minutes.
- Remove from the oven and cut into 8 bars while still warm — the mixture firms up as it cools, so cutting at this stage is much easier.
- Let cool completely before handling or storing.
The parchment paper matters here. A well-lined pan means the bars lift out cleanly without sticking or crumbling. If your bakeware has seen better days, it's worth checking whether your non-stick pan still performs correctly before using it for recipes where release is critical.
baking time at 180°C for 8 ready-to-eat bars
A genuinely practical snack for active people
These homemade granola bars were designed to travel. Once cooled and fully set, they hold their shape in a bag, a lunchbox, or a gym kit without crumbling or melting. They work for children heading to school, adults grabbing something between meetings, and anyone who needs a real energy source before or after physical activity.
Less processed, more economical
The comparison with industrial cereal bars is blunt: most commercial options contain emulsifiers, glucose syrup, vegetable fats of questionable origin, and a long list of stabilizers. These 4-ingredient oat bars contain none of that. The ingredient list is readable in under five seconds.
The cost advantage is equally clear. Four basic pantry ingredients — oats, chocolate, coconut oil, maple syrup — produce 8 bars at a price that's difficult to match on any supermarket shelf. Batch-making on the weekend means you have a week's worth of snacks sorted in a single session.
Customization options that actually improve the recipe
The base recipe is a starting point, not a ceiling. Adding nuts, almonds, or dried fruit to the mixture before baking increases nutritional density and introduces new textures. Walnuts and hazelnuts work particularly well with dark chocolate. Dried cranberries or raisins add a fruity acidity that cuts through the richness.
These variations keep the recipe interesting across multiple batches and let you tailor the bars to whoever is eating them. For more inspiration on quick, wholesome baking, the chocolate and walnut brownie made in 20 minutes follows a similar logic: few ingredients, honest flavors, minimal effort.
Store the bars in an airtight container at room temperature. They keep well for several days without losing texture or flavor — no refrigeration required.
Stored properly, these chocolate oat energy bars stay fresh for several days. Make them once, eat them all week. That's the kind of efficiency that actually fits into a real schedule.